
Coding Challenge #68 - Blogging Software
This challenge is to build your own blogging software.

Hi this is John with this week’s Coding Challenge.
🙏 Thank you for being one of the 60,041 software developers who have subscribed, I’m honoured to have you as a reader. 🎉
If there is a Coding Challenge you’d like to see, please let me know by replying to this email📧
Coding Challenge #68 Build Your Own Blogging Software
This challenge is to build your own blogging software.
A blog (short for weblog) is a website that is intended to be regularly updated by it’s owner. These regular updates are typically written in an informal style or as a series of articles/tutorials documenting or explaining something.
Blogs became popular in the early 2000s as part of the move to Web 2.0 - when websites began to move from passive documents to participatory user-generated content.
If You Enjoy Coding Challenges Here Are Three Ways You Can Help Support It
Refer a friend or colleague to the newsletter. 🙏
Sign up for a paid subscription - think of it as buying me a coffee ☕️ twice a month, with the bonus that you also get 20% off any of my courses.
Buy one of my courses that walk you through a Coding Challenge.
The Challenge - Building Your Own Blogging Software
In this coding challenge we will be building a simple blogging platform. Fundamentally a blog should provide you with some way to write and edit the blog posts, the software to render them as HTML using a layout you’ve designed, and a way for readers to comment on your posts.
Step Zero
In this step you decide which programming language and IDE you’re going to use and you get yourself setup with a nice new project ready to build your blogging software.
Step 1
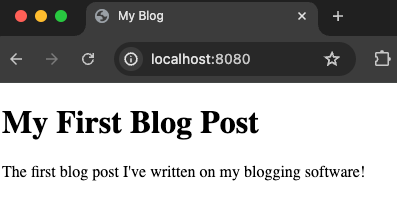
In this step your goal is to serve a static web page. You want to be able to run your blog software and have it serve traffic on your developer machine. For me that means I’ll simply run it on port 8080 and visit it with a browser:
Or curl:
% curl -i <http://localhost:8080/>
HTTP/1.1 200 OK

<!DOCTYPE html>
<html lang="en">
  <head>
    <title>My Blog</title>
  </head>
  <body>
    <h1>My First Blog Post</h1>
    <p>The first blog post I've written on my blogging software!</p>
  </body>
</html>
Once you’ve done this you are able to serve HTML from your blogging platform.
Step 2
In this step your goal is to render some content in a template. Ultimately once we have a full blogging platform it’s main job is to read articles from some form of datastore and render them as HTML using a common layout. That layout is usually defined with a template. For this step let’s turn our index page into a template and render some content in it.
Here’s what the template might look like:
<!DOCTYPE html>
<html lang="en">
  <head>
    <title>My Blog</title>
  </head>
  <body>
   {{postlist}}
  </body>
</html>
Which we could then fill in from some sample data we might have retrieved from our datastore, i.e. we might get some JSON:
{
    "posts": [
        {
            "title": "My First Blog Post",
            "summary": "The first blog post I've written on my blogging software!",
            "post": "This is my first blog post content..."
        }
    ]
}
When you then visit the blog as before you should see the same result that we saw in step 1.
Step 3
In this step your goal is to be able to write the content of a blog post on a web page. To do this you’ll need to do several things:
Create an admin section for the blog. I’d suggest you make that available via a URL like:
/editor. When you visit this section you should be authenticated, or if you are not authenticated directed to a login page.Create a page to create a new blog post (perhaps
/editor/post). On this page allow the user to enter a post title, summary and the post itself. To allow for formatting I suggest you encourage the user to write the post using Markdown.When the user hits ‘post’ or ‘save’ (whatever you decide to call it) the content should be saved as a new post. For now, I’d suggest simply writing the Markdown to a file, perhaps using the JSON format above.
Render the post at a suitable URL using a template. For example it might be at
/posts/1.
Step 4
In this step your goal is to support editing the content of a blog post. The user should be able to login, select a post from a list and then edit the post, updating the fields in the post.
At this stage you should also add a published date and time to the post, which get’s set when the post is created and can optionally be updated when editing.
Step 5
In this step your goal is to store the content of the posts in a database rather than as a text based file. You could do this with a SQL or NoSQL database. Your task here is to consider the tradeoffs and then update the existing code to use your chosen option to save and read all the posts.
Step 6
In this step your goal is to render a homepage listing the blog posts from the database. The posts should be ordered from newest to oldest. Each title should be a link to the full blog post.
Step 7
In this step your goal is to allow comments on blog posts. A user should be able to enter their name, email and comment in response to a blog post.
You should render the comments under a post in order of newest to oldest.
Going Further
You can take this coding challenge further by adding:
Support for RSS feeds
The ability to edit the template through the
/editorsection of the blog.The ability to schedule a post.
2 Other Ways I Can Help You:
I write another FREE newsletter Developing Skills that helps you level up the other skills you need to be a great software developer.
I have some courses available:
Build Your Own Redis Server (Python Edition) which guides you through solving the Redis Coding Challenge in Python.
Build Your Own Shell (Go Edition) which guides you through solving the Shell Coding Challenge in Go.
Share Your Solutions!
If you think your solution is an example other developers can learn from please share it, put it on GitHub, GitLab or elsewhere. Then let me know via Twitter or LinkedIn or just post about it there and tag me.
Request for Feedback
I’m writing these challenges to help you develop your skills as a software engineer based on how I’ve approached my own personal learning and development. What works for me, might not be the best way for you - so if you have suggestions for how I can make these challenges more useful to you and others, please get in touch and let me know. All feedback greatly appreciated.
You can reach me on Twitter, LinkedIn or through SubStack
Thanks and happy coding!
John